vividreal | July 31, 2020
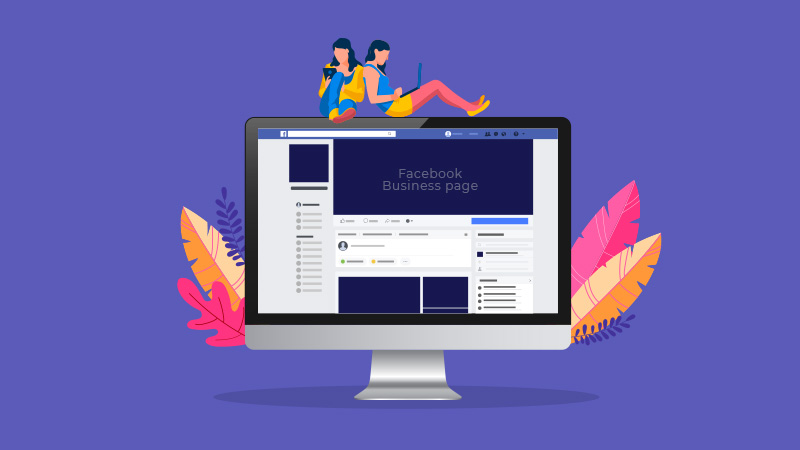
The Complete Guide to Setting Up a Facebook Page for Your Business
Facebook is now a great platform where businesses thrive. The reason for this is a no-brainer; it has over 2.5 billion global users and any kind of business can find their potential customer there. Facebook also has multiple channels through which businesses can sell. You can use Facebook Groups, Marketplace, Store, or even launch ads to promote your business.
Maintaining a Facebook page is vital for any business since it is one way of making your business accessible to the public. Through your page, you can reach your potential customers. Setting up a Facebook business page isn’t a difficult job. It is a simple step by step process. In this article, we’ll be discussing every single step required to set up your Facebook Business Page. Read on to find out more.
If this gets too complicated, and if you need some help, we’re here for you. We have an amazing team of digital marketing experts to assist you. Alright, let’s get started!
Step 1 – Create Page
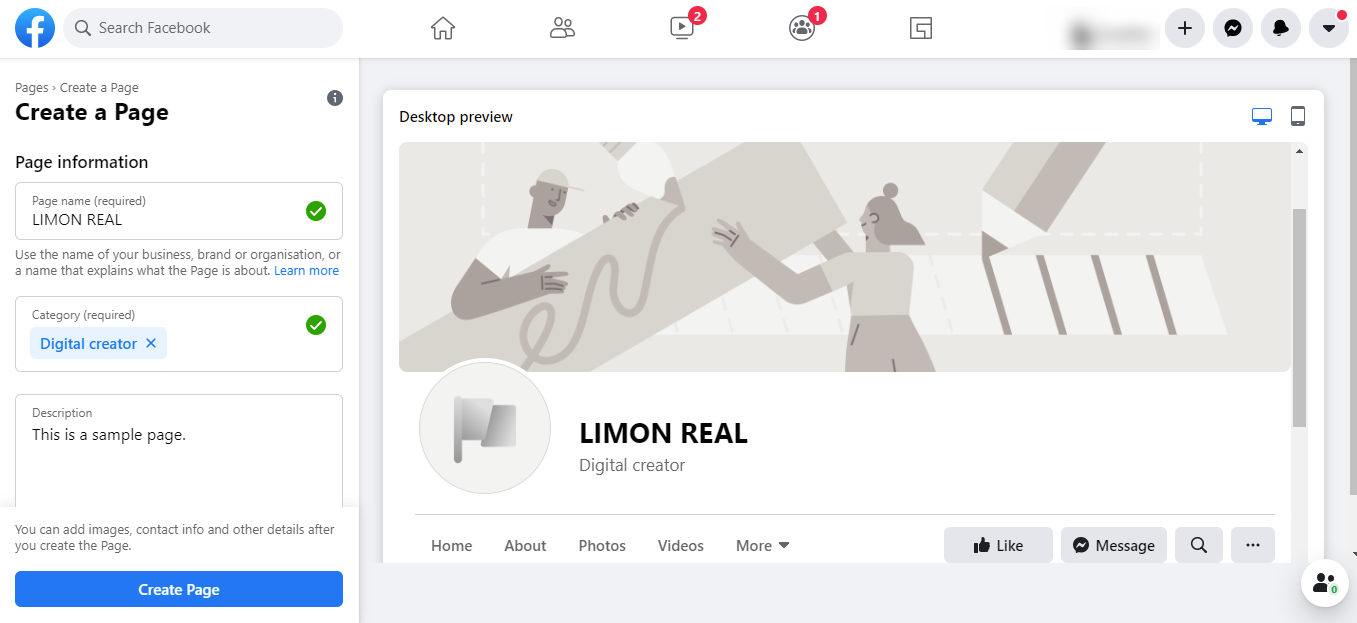
Firstly, you need a Facebook account. You can use your personal Facebook account for this. Your page won’t reveal your personal details to the public. Click on the “+” button on the top right side of the banner and select “Page” or simply go to facebook.com/pages/create. Now you’ll need to select the type of page you wish to create. Either Business/Brand or Community/Public Figure. Select the Business/Brand option to create a Facebook Page for Your Business.
Step 2 – Page Name & Category
The next step is to provide the page name; try to use your business name or names that people would likely search. Now, select your business category from the options provided. It’s quite certain that people will find their category because Facebook provides tons of options to choose from. Also, if you think your business falls under more than one category, choose the one that people can best relate to.
Once this is done, the box will further expand to ask you details like the address and phone number. Also, they’ll let you keep this information away from the public or maybe show only your city and state as per your liking. Now click on “Continue” to proceed forward accepting the Facebook’s Pages, Groups and Events Policies.
Step 3 – Profile picture & Cover picture
Now, it’s time to upload the profile and cover pictures for your page. This is an important step because they are the elements that a page visitor notices about your page at first sight. These elements should align with your business and brand because they appear in the search list along with your business name.
If you wish to include texts in these, make sure that it’s legible; also avoid using an odd colour combination in them. Go for a minimalist, sleek look and use high-resolution photos. If you’re a fairly known brand, then you can use your original brand logo for this. The prime purpose of these pictures is to be recognizable.
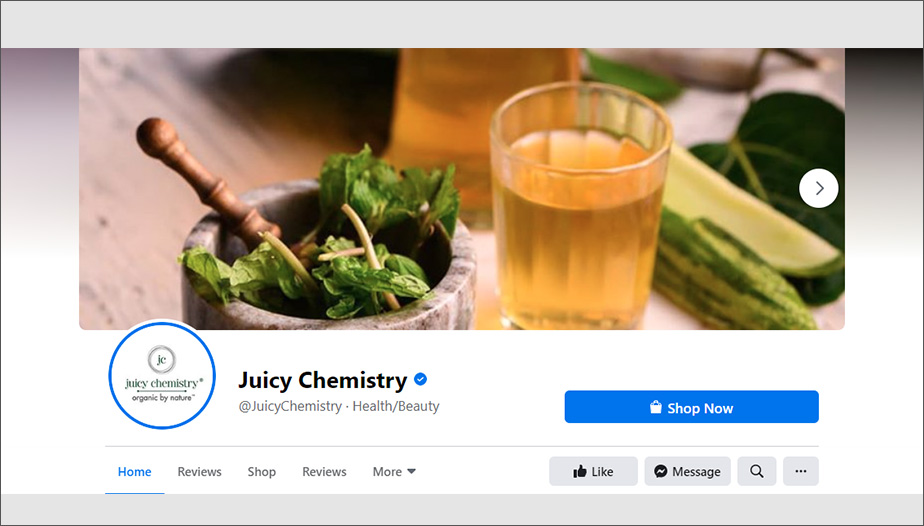
Take note of the dimensions so that it looks appealing when someone visits your page. It’s 170 x 170 pixels on a desktop and 128 x 128 pixels on mobile; also remember to avoid placing details on the image’s corner since Facebook crops it into a circle. Finally, click on “Upload Profile Picture”.
Similarly, apply the same logic and basic principles while choosing or designing your cover image. Some businesses use a high-resolution photo of their team or storefront, while some use the company slogans or banners so as to portray the personality of their business. There are some who use this space to highlight offers or promotional content. The recommended size for a cover image is 720 x 315 pixels, so try to stick to that for best results. Finally, click on “Upload Cover Photo”.
Step 4 – Create Username (URL)
The next step is to create your username or the URL. Your username will be used by people to find you on Facebook. Pick a username that’s the same as your business name. It should match your other social media handles as well. Although you can use up to 50 characters, it is preferable to stick to a shorter URL because it’s easier to remember. If the name you wish to have is already taken, try to use a term that is related to your product or industry, else add a related suffix term, or simply use your location as a part of the username. Finally, click on “Create Username” to confirm, and a box will pop up showing you the links people can use to connect with your business on Facebook and Messenger.
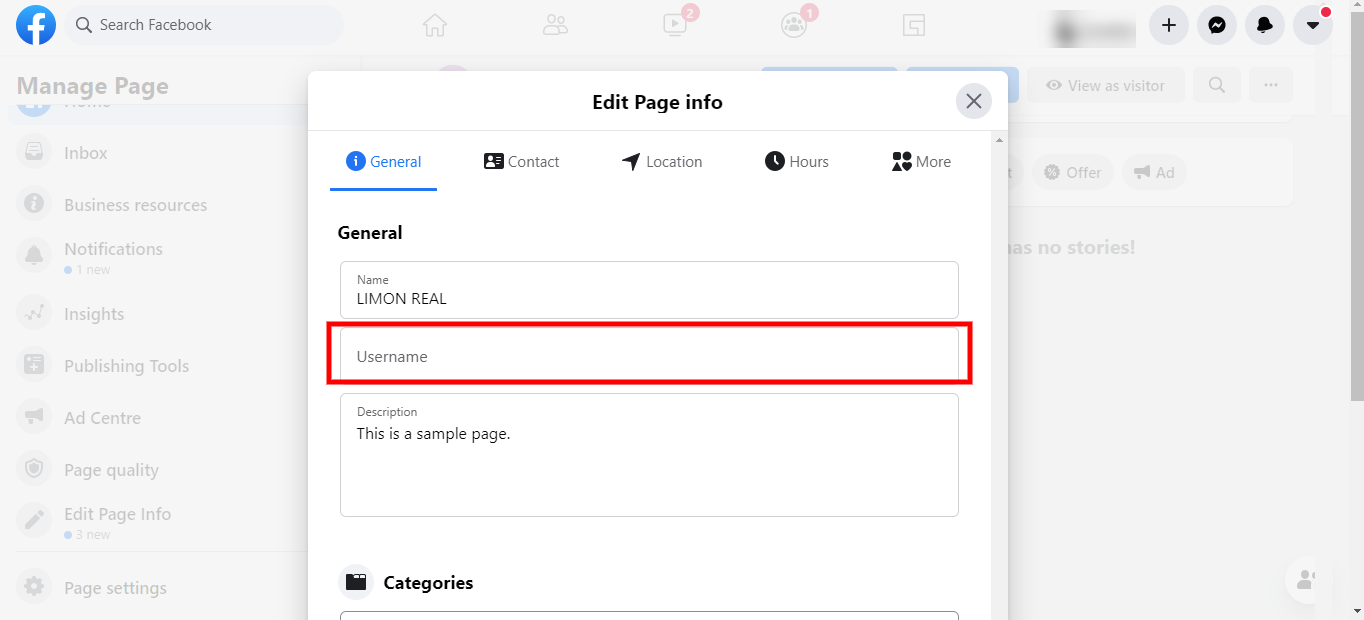
Usually, Facebook automatically prompts you to change your page URL. In case, if it doesn’t happen, you can change it by accessing the “About” section of your profile.
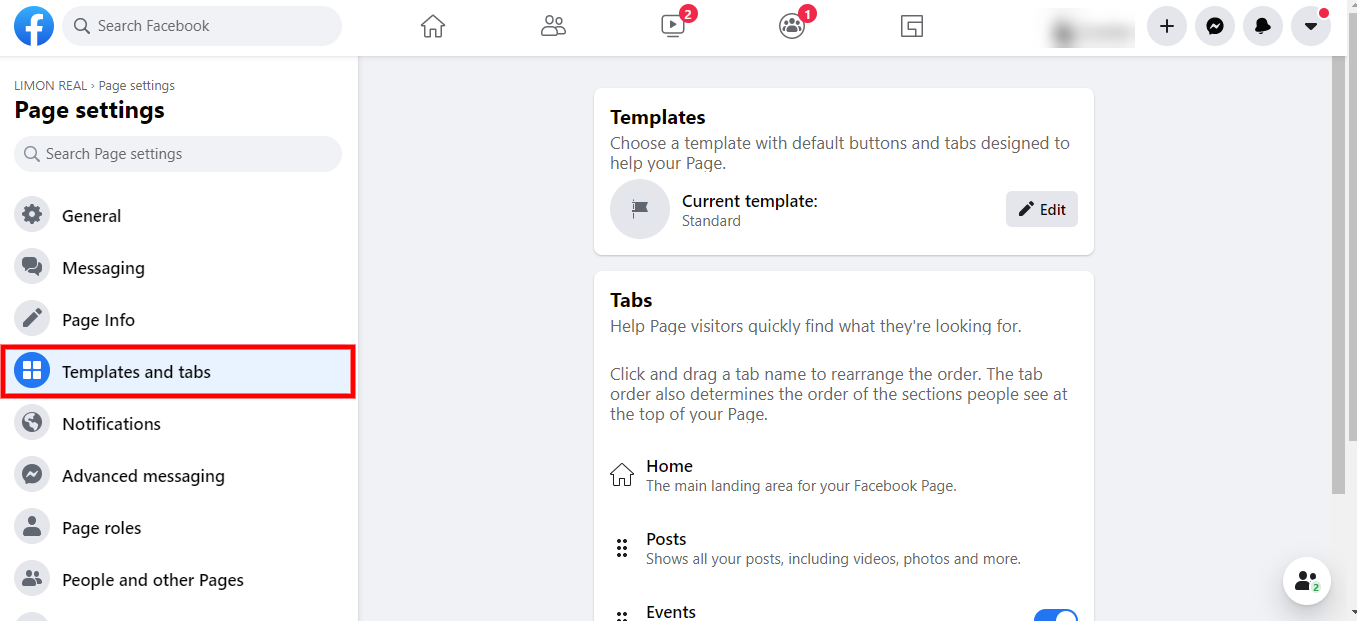
Step 5 – Choose your Template or Customize them
All the above-mentioned steps were just the basics. After completing all of them, go to “Edit Page Info” or “Settings”.
Access the “Templates and Tabs” feature placed at the left side. Using this, you can set the tabs that you want to display on the sidebar of your page. This could be “Reviews”, “Offers”, and so on. There are templates available for different types of business categories like shops, restaurants, service businesses, and more. These templates are predesigned based on the type of business by using various different tabs in the order of relevance. You can also customize these templates by adding or removing tabs from the default ones.
Also, make sure that you only use tabs that are required. Keeping too many tabs might excite viewers but doesn’t serve the purpose if it’s broken. For example, using an “Instagram” tab without having an Instagram business page is pointless.
Step 6 – Additional Information
The next important step is to give additional information about your business. You might leave it incomplete, or think of doing it later. But it’s something that people look for after landing on your page, so updating your page with these is a necessity. Lack of information could create ambiguity in people’s minds and further lead your potential customer to your competitor’s page just because they took the effort to write down all the additional information. So, take time and carefully fill in all the fields.
For this, go to the “Edit Page Info” on the top panel/menu. You can edit all the contact information (email, phone number), working hours and location here. Meanwhile, ensure that the location specified links to your business in Google Maps. Write a crisp and brief business description by limiting it to a couple of sentences (maximum of 255 characters). You can also add your Impressum (a legally-mandated statement of the ownership and authorship), price range, and privacy policy link if it’s relevant to specify to the public.
The next important piece of information that you could provide your page’s first-time viewers is your company’s unique story, personality and information about relevant products or services that you offer. Ensure that you don’t simply stuff it with keywords rather than telling your story. You can place this information under the “More Info” section in the “About” tab. You can access this by clicking on “See More” on the left menu. Further, go to “About” and click on “Our Story”. And finally, hit the “Publish” button.
Step 7 – Add Appropriate Call-to-Action
Adding a relevant CTA button to your Facebook Page can make a huge difference in driving traffic to your website. You can link this button with your appointment-setting software or e-commerce platform. Or if these don’t apply to your business, you can use the button to send traffic to a specific website or landing page. Your CTA can be very basic “Send Message” if that’s what is relevant to your business. If your business is focussed on selling a variety of products, you can set up a Facebook store by clicking on “Add Shop Section” as well.
You can add this functionality to your Facebook page by clicking on “+ Add a Button” which can be seen below the cover picture. Here, you can choose the CTA button which you wish to add on your page and finally confirm.

Once this is done, your CTA button would appear on the page. Try not to skip this step since relevant CTA’s can drive in more sales, traffic, bookings, or conversion for your business.

Step 8 – Use the Services Tab
The Services tabs do not apply to all types of businesses, yet it is an important part to specify for the ones who have it. Completing the fields under this section allows you to highlight your business’ specific offerings in detail.
In this section, you can specify a particular service along with other related details like price, description, images if it’s applicable to the service that you offer. Use it as a medium to showcase your expertise and inform visitors more about your business. Not just helping the viewers, this practice also helps your Facebook page rank for relevant keywords in Google.
Step 9 – Customize Facebook Messenger
One way to stay connected with the page visitors is to automate Messenger for sending customized messages. With this, automated replies, away messages and other greetings can reach your visitors, ensuring that they get the information they need when they try to get in touch with you.
If you are a small scale business owner, make sure that you respond to your customers promptly. You can even prepare and keep an answer to frequently asked queries beforehand so that it is easier to manage when a visitor asks.
One major reason why you shouldn’t ignore managing your messenger is that customer service and satisfaction is of high importance. Especially on social media, where people expect you to reply ASAP. People appreciate this promptness, further helping in retaining the customers.
Step 10 – Enable Customer Reviews
Having positive comments or reviews on your page is a brilliant way to showcase what your customers like about your business to the public. It is an additional effort that needs to be put in since it would require you to moderate the unfavourable reviews as well. But putting a little bit of effort to populate proper customer reviews is worth the headache since it can go a long way in helping your business grow. Facebook star ratings show up on both Facebook and Google searches, so now you why these reviews are important.
Step 11 – Your First Post
There must be something on your page for a page visitor to view before you invite them to visit your page. Offer some valuable content by creating your own post or by sharing relevant content from veteran leaders in your industry. Or this can be an event or a product offer as well.
The only thing to remember is that whatever you post should make sense to your page visitor. If people can’t relate to the contents you post, it won’t help in contributing to any type of conversion.
Step 12 – Publish & Invite Audience
After you’re done with all the steps mentioned before, you’re good to go. Now you’ve created a space where your potential customers and fans feel comfortable interacting with you. Finally, hit the “Publish Page” button in the left-hand menu to save. Now your page is live and visible to the public. So start by inviting your existing Facebook friends to view your page and “like” it if possible. You can use your other social media platforms to promote this page as well.
Conclusion
Facebook pages are a great place to expand your business. All you need to do is to keep it engaging and active so that you can reach your prospects.
You can ask your customers to share their honest product/service review on the Facebook page. This, in turn, enhances the page outlook. Ensure that you present the public with legit and up-to-date information about your brand.
You can add a pinned post on top of your Facebook business page, just under your cover image. Use this space to place an attention-grabbing post to draw your visitors in and make them stick around.
If you think you can do better than the already existing templates, go ahead and customize it by adding new or removing old tabs. You can also connect with other pages by liking them; they don’t have to be your competitors, it can be pages that are relevant to your business.
And not to forget about having a check on the page insights. You can create content based on the audience who visits your page. The content that satisfies the page visitors will help your page grow.
If you’re still in need of professional help, worry not, we’ve got you covered. Our team of digital marketing experts would be glad to help you.


